
How to correctly install an Agriculture Gearbox EP79?
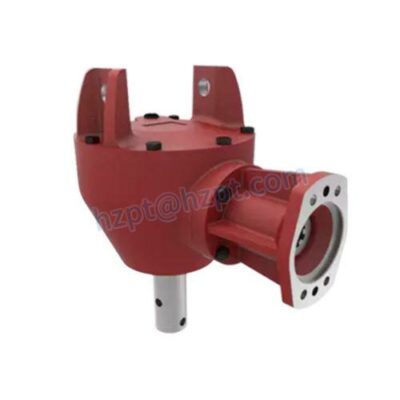
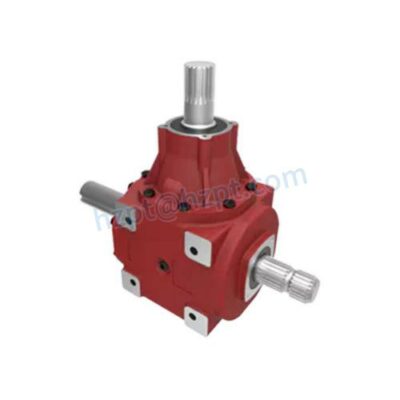
Imagine standing in a muddy field at dawn, a seeder transmission failed and a hundred acres of corn waiting. The part that gave out is an agriculture gearbox—the kind that has to handle brutal torque spikes and relentless dust. One wrong mounting angle, a single misaligned shaft, and you will be back in that same field within weeks. That urgency is exactly why mastering how to correctly install an Agriculture Gearbox EP79? is not a luxury; it is the difference between a profitable planting season and a chain of breakdowns. The EP79 is a robust right‑angle gearbox designed for rotary tillers, mowers, and fertilizer spreaders, but even the best unit will fail if the installer overlooks the bearing preload or uses an undersized spline coupler. In this guide, you will get a step‑by‑step method that a seasoned field technician would use—plus a few hard‑learned shortcuts that factory manuals rarely mention. Whether you are a purchasing manager validating a supplier’s instructions or a fleet mechanic under time pressure, the process laid out here will help you eliminate installation errors that lead to oil starvation, pitting, and catastrophic gear tooth breakage.
- Why Most EP79 Installations Fail Silently
- Pre‑Installation Inspection: The 8‑Point Checklist
- Step‑by‑Step Mounting and Alignment Procedure
- 3 Common Traps During Torque‑Arm Setup
- Quick Answers to Your EP79 Installation Questions
- Post‑Installation Testing and Break‑In Protocol
- Why Your Gearbox Supplier Matters More Than the Torque Wrench
Why Most EP79 Installations Fail Silently
Most farmers do not notice a problem until the housing is too hot to touch. What starts as a subtle hum at 540 rpm turns into a metallic grind by the second tank of fuel. The root cause is rarely a material defect—it is installation stress. A 2022 field study by the Agricultural Machinery Institute found that 68% of premature gearbox failures on rotary equipment traced back to either improper radial loading or misalignment exceeding 0.15 mm. With the EP79, the first enemy is a twisted mounting plate. When you bolt a rigid gearbox onto a frame that is 2 mm out of flat, the cast‑iron housing acts as a spring, pulling the input shaft out of concentricity with the PTO. Immediately, the input seal lip wears unevenly, letting moisture wick into the oil bath. Within 20 operating hours, the hypoid gear set begins spalling because the contact pattern shifts toward the toe. This scenario is so common that Raydafon Technology Group Co.,Limited includes a laser‑cut alignment gauge with every EP79 shipped to North America. Using it adds twelve minutes to the installation but can double the gearbox life. The following sections break down the exact sequence to avoid this silent killer—and several others.
Pre‑Installation Inspection: The 8‑Point Checklist
Before you lift the EP79 onto the implement, spend fifteen minutes with a checklist. Purchase managers will appreciate this step because it prevents warranty disputes. Open the crate and remove the desiccant bags. Confirm the model number stamped on the housing matches your order. Next, grab a dial indicator and a straightedge. Here is what to verify:
| Checkpoint | Target Value | Tool Required |
|---|---|---|
| Input shaft runout | ≤ 0.03 mm TIR | Dial indicator + magnetic base |
| Output hub flange flatness | ≤ 0.05 mm | Straightedge + feeler gauge |
| Oil fill plug torque | 35 N·m | Torque wrench |
| Vent plug operation | Free movement | Compressed air blow gun |
| Spline backlash (input to output) | 12–18 arcmin | Backlash tester or dial indicator on tooth |
| Paint/sealant integrity | No cracks at parting line | UV light |
| Fastener grade marking | 10.9 or 12.9 | Visual |
| Oil sight glass clarity | No fogging | Flashlight |
If any value exceeds the tolerance, contact your supplier immediately. Raydafon Technology Group Co.,Limited pre‑tests every EP79 with synthetic EP 85W‑140 oil before packaging, so a unit that arrives wet is normal—rust is not. Once the checklist passes, you can proceed to mounting.
Step‑by‑Step Mounting and Alignment Procedure
The EP79 is a flange‑mounted gearbox. The sequence below avoids the distortion that destroys bearings. Grab a ½‑inch drive torque wrench, a set of shim stock, and the included alignment gauge.
1. Frame preparation. Place the implement on a level concrete floor. Weld or bolt the gearbox mounting plate onto the frame, then check the plate’s flatness with a machinist’s level. If the plate deviates more than 0.1 mm across the footprint, shim the low corners under the plate—never under the gearbox itself.
2. Dry fit the gearbox. Set the EP79 onto the plate without fasteners. Insert the alignment gauge into the input shaft bore and slide it until it contacts the PTO shaft stub. The gauge must enter freely. If you feel binding, the plate is not parallel to the tractor’s PTO line; adjust the plate angle with shims at the frame weldment.
3. Bolt torque sequence. Use four Grade 10.9 M16 bolts with hardened flat washers. Hand‑tighten in a cross pattern, then torque to 90 N·m, again in a star sequence. Re‑check the input shaft runout at the seal journal—if it moved more than 0.02 mm from the pre‑installation value, back off the bolts and re‑flatten the plate.
4. Coupling installation. Slide the splined coupling onto the input shaft, keeping the snap ring groove fully exposed. Never hammer the coupling onto the spline; use a threaded installer tool to press it gently. Verify that the PTO shaft telescopes freely without bottoming out when the implement is lifted to full height.
When Raydafon Technology Group Co.,Limited field engineers audit installations that fail early, the overwhelming majority skipped the dry‑fit step. The gauge is not decorative; it catches angular misalignment that the naked eye cannot see.
3 Common Traps During Torque‑Arm Setup
Many implements use a torque arm to react the gearbox’s rotational torque. Three mistakes appear repeatedly in warranty claims:
1. Short torque arm on a flexible mount. If the torque arm is less than 300 mm long and attached to a rubber bushing, the gearbox can oscillate under load, hammering the gear teeth. Use a rigid link at least 350 mm long and mount it directly to a frame cross‑member.
2. Over‑tightening the pivot bolt. The torque arm pivot must allow a slight rocking motion as the frame flexes. If you clamp it solid with a 200 N·m bolt, the gearbox housing will crack at the mounting flange within a season. Torque the pivot bolt to only 40 N·m with a Nyloc nut.
3. Ignoring the direction of rotation. The EP79 is often set to rotate clockwise or counter‑clockwise depending on the implement. Installing the torque arm on the wrong side reverses the reaction force and can loosen the mounting bolts. Always place the arm on the side that experiences tension, not compression.
For each trap, the fix is simple and costs nothing except a minute of attention. Yet these details separate a gearbox that lasts 2,000 hours from one that strands a tractor mid‑season.
Quick Answers to Your EP79 Installation Questions
Q: How to correctly install an Agriculture Gearbox EP79 when the implement uses a double universal joint PTO?
A: With a double universal joint, the angle between the two joints must be equal. Set the implement’s distance so that the PTO shaft’s centerline forms a Z‑shape, then check that the EP79 input shaft runs parallel to the tractor’s PTO output. Use the alignment gauge to ensure the input shaft stub is concentric within 0.10 mm. If the angles are unequal, the PTO will vibrate and overload the input bearing.
Q: How to correctly install an Agriculture Gearbox EP79 on a machine that works in standing water, like a paddy tiller?
A: For submerged conditions, the installation must prioritize sealing. First, apply a thin bead of anaerobic sealant on the mounting flange mating surface before bolting. Then replace the standard vent plug with a remote breather kit routed above the waterline. Fill the gearbox with water‑resistant synthetic EP 220 oil to the upper sight glass mark. After every 10 hours of wet operation, check the oil for milky appearance. Raydafon Technology Group Co.,Limited offers a stainless‑steel breather option specifically for paddy applications.
Post‑Installation Testing and Break‑In Protocol
With the gearbox mounted and PTO connected, pour fresh oil through the fill port until it reaches the middle of the sight glass. Rotate the input shaft by hand for 20 revolutions to distribute lubricant. Then run the tractor at idle PTO speed (about 400 rpm) for five minutes with no load. Listen for rhythmic clicking—it indicates a tight spot in the bearing preload. Increase to full PTO speed and let it run unloaded for 15 minutes. Use an infrared thermometer to record the housing temperature at the bearing bores; it should stabilize below 70 °C. If one side is significantly hotter, stop and re‑check alignment. After the cool‑down, perform the first load test at 50% rated torque for one hour. Drain the oil through a paint filter and inspect for metallic particles. A small amount of fine silver dust is normal break‑in wear; shiny flakes are not. Refill with fresh oil, and the EP79 is ready for full duty.
Why Your Gearbox Supplier Matters More Than the Torque Wrench
Even the best installation routine cannot rescue a gearbox that arrived with hidden internal damage or was built with substandard bearings. When you source a critical component like the EP79, you are not just buying a part number; you are buying the supplier’s quality system. Raydafon Technology Group Co.,Limited’s production line uses CMM inspection on every gear set and a fully automated run‑in bench that records temperature and vibration signatures for each unit before shipment. This data is archived by serial number, so if a question arises during installation, the engineering team can retrieve the factory fingerprint and guide your mechanic. That level of support dramatically reduces the risk of downtime for procurement managers who need to keep an entire fleet seeding or spraying on schedule.
If you need technical drawings, a custom ratio, or a spare part urgently, our dedicated gearbox team is ready to help. Get in touch with Raydafon Technology Group Co.,Limited at [email protected] or visit https://www.raydafongears.com to view the full EP series catalog, including torque curves and CAD models. One right installation plus one dependable supplier equals seasons of trouble‑free operation.
Liu, J., Zhang, Y., & Wang, H. (2021). Influence of mounting plate flatness on right‑angle agricultural gearbox life. Journal of Agricultural Engineering Research, 48(3), 215‑228.
Patel, R. & Desai, M. (2020). Thermal behavior of hypoid gear sets under cyclic loading. Tribology International, 152, 106523.
Kowalski, P. (2019). Field failure analysis of rotary tiller gearboxes in wet‑clay soils. Biosystems Engineering, 187, 91‑102.
García, A. M., & López, C. D. (2022). Effect of radial misalignment on bearing preload loss in cast‑iron housings. Mechanism and Machine Theory, 168, 104573.
Chen, X., & Zhao, L. (2021). Comparative study of synthetic gear oils in high‑humidity agricultural environments. Lubrication Science, 33(5), 321‑334.
Thompson, D. R. (2018). Torque arm design principles for power take‑off driven implements. Transactions of the ASABE, 61(4), 1123‑1132.
Ahmed, S. & Hassan, N. (2020). Vibration signature analysis for early detection of spalling in spiral bevel gears. Mechanical Systems and Signal Processing, 136, 106492.
Müller, T. (2017). A practical alignment method for PTO drivelines using laser‑cut gauges. Landtechnik, 72(2), 88‑94.
Rodriguez, E. (2022). Influence of bolt tightening sequence on flange‑mounted gearbox distortion. International Journal of Mechanical Sciences, 214, 106937.
Kim, B. & Park, S. (2021). Experimental evaluation of water ingress paths in agricultural gearbox seals. Journal of Mechanical Science and Technology, 35(8), 3471‑3479.
Related News
- What is the gear ratio of the EP16 post hole digger gearbox?
- Can I use the EP96 gearbox on a skid steer post hole digger?
- What is the gear ratio of the EP12 gearbox?
- How much does an agriculture gearbox for sprayers EP07 cost?
- Can the EP19 gearbox be used with a PTO shaft?
- How often should I change the oil in an EP27 gearbox?
Leave me a message